Deploy Program Metadata
Prior to deploying metadata from the Deployments screen, the best practice recommendation is to perform the following steps first:
-
Compare the newest deployed metadata version with the current un-deployed state to verify that no unexpected or undesired changes will be deployed. See Compare Metadata Versions for more information.
-
Validate the current un-deployed metadata to make sure no incorrect expression code gets deployed to the server that could cause issues. See Validate Current Metadata for more information.
To deploy metadata from the Deployments screen:
-
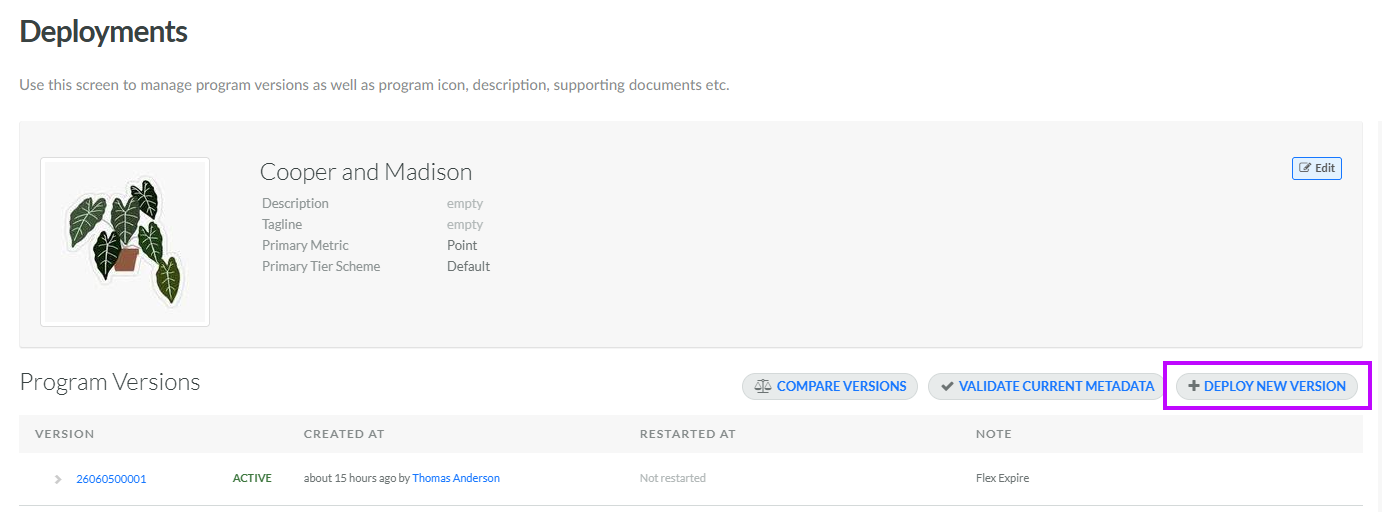
Select Program from the top navigation bar, then select Deployments from the side navigation menu. The Deployments screen is displayed.
-
Click Deploy New Version. The New Program Version pop-up window is displayed.
Note: As an alternative, if you ran the validation process, you can simply click Deploy New Version from within the Validation Result pop-up window. The New Program Version pop-up window is displayed.
-
In the Version field, enter a deployment version. The best practice recommendation is to increment the previous version number. The previous version number can be found on the Deployments screen within the Program Versions log.
-
Optionally, in the Note field, enter a description of the changes in this version.
-
The platform displays a log of all the changes included in this version. Review these changes to confirm that the desired changes are getting deployed.
-
Click Create & Deploy Metadata. A confirmation dialog box is displayed; click Confirm.
-
If the deployment was successful, a success message is displayed. Click Close.